Installing Archlinux using ISO
Arch Linux is a lightweight and highly customizable Linux distribution. This guide covers the full installation process and details how to modify an existing Arch installation using the Arch Live ISO.
Part 1: Installing Arch Linux
Step 1: Boot into the Arch Linux ISO
-
Download the latest Arch Linux ISO from the official website.
-
Create a bootable USB using tools like dd , Rufus,
ventoy(recommended), balenaEtcher:if using dd
dd if=archlinux.iso of=/dev/sdX bs=4M status=progress && sync -
Boot from the USB and select “Arch Linux Installer”. (here is standard method)
Turn off your laptop completely.
Plug in your Arch USB stick.
Hit the power button and start spamming the end or F12 key (or your specific boot menu key) right away to open the boot options.
If F12 doesn’t work, some laptops use F2, F10, or Delete to enter the BIOS/Boot Menu
Choose your USB drive from the menu, and you’re ready to start the install!
Step 2: Connect to the Internet
For wired or ethernet connection:
ping -c 3 archlinux.orgFor Wi-Fi: (use iwctl)
iwctl
device list ## wifi device name i.e wlan0 , and adapter i.e phy0
adapter phy0 set-property Powered on ## if powered off
station wlan0 scan ## scan wifi networks
station wlan0 get-networks ## lisiting of wifi networks
station wlan0 connect <SSID> ## connect to wifi network
station wlan0 show # to get info about wifi check state field
exit

dhcpcd # to get ip assigned
Verify with:
ip a
ping 1.1.1.1
Step 3: Update System Clock
timedatectl set-ntp trueStep 4: Partition the Disk
- Check available disks
lsblk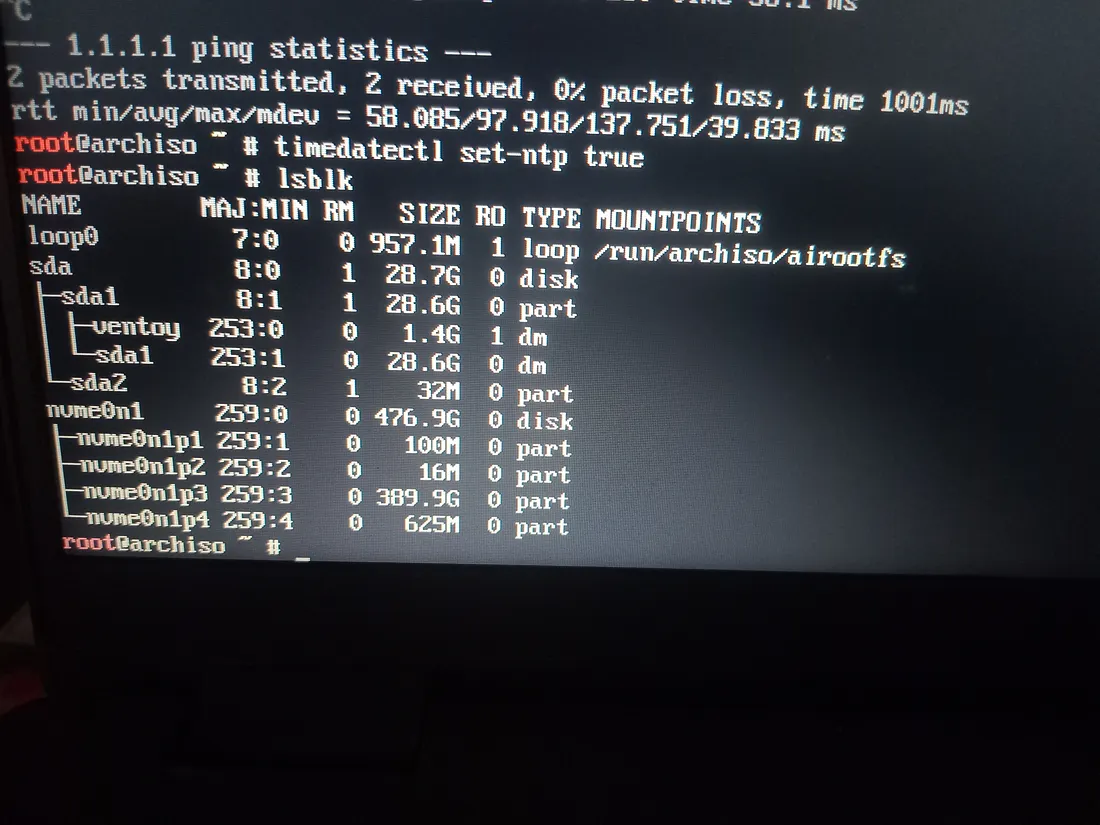
- Use fdisk or cfdisk (recommanded ) to partition:
In this Format
EFI Partition: 1GB (Type: EFI System)

Root Partition: 400GB (Type: Linux Filesystem)

Swap Partition: 8GB (Type: Linux Swap)
EFI Partition size should be about 1 GB
Root Partition Size Should be at-least 20GB for smooth running
Swap Partition Size should be between 500MB to 8GB and its optional
We will use cfdisk here
cfdisk /dev/nvme0n1use nvme0n1 or something that is system disk , dont use usb disk like sda
refer this guide for creating partition using cfdisk
Step 5: Format and Mount Partitions
Always run in this sequence post-partitioning: EFI → Swap → Root, then mount
mkfs.fat -F32 /dev/nvme0n1p1   # EFI
mkswap /dev/nvme0n1p3          # Swap
mkfs.ext4 /dev/nvme0n1p2       # Root
now mount
mount /dev/nvme0n1p2 /mnt                  # Root
mount --mkdir /dev/nvme0n1p1 /mnt/boot/efi # EFI
swapon /dev/nvme0n1p3                      # Swap
Step 6: Install Base System
Update Key-ring if ISO is Old
pacman-key --init
pacman-key --populate archlinux
pacman -Sy archlinux-keyring
rm -rf /mnt/var/cache/pacman/pkg/* # Remove corrupted packages If Need
Update the mirrorlist change country if needed
--country India
reflector --country India --protocol https --latest 20 --sort rate \
  --save /etc/pacman.d/mirrorlist
Install packages (required)
pacstrap /mnt base linux linux-firmware nano sudo iwd reflector grub efibootmgr dhcpcd vimOptional packages
pacstrap /mnt man-db man-pages less inetutils usbutils pciutils which diffutils fileGenerate fstab:
genfstab -U /mnt >> /mnt/etc/fstabStep 7: Chroot into the System
arch-chroot /mntStep 8: Configure System
Set Your time zone
example
Asia/Kolkata
ln -sf /usr/share/zoneinfo/Asia/Kolkata /etc/localtime
hwclock --systohc
Edit Locale
based on Your laptop
KeyboardandLanguagecommon one is
UTF-8andUnited states English
nano /etc/locale.gen  # Uncomment en_US.UTF-8 UTF-8
locale-gen
echo "LANG=en_US.UTF-8" > /etc/locale.conf
Set Hostname
echo "archlinux" > /etc/hostname
nano /etc/hosts
Add The hosts
127.0.0.1   localhost
::1         localhost
Set The Root Password
passwdadd user if needed
useradd -m -G wheel -s /bin/bash username
passwd username
Give Sudo Permission (if needed)
nano /etc/sudoers # Uncomment "%wheel ALL=(ALL:ALL) ALL"
Install bootloader GRUB for UEFI
grub-install --target=x86_64-efi --efi-directory=/boot/efi --bootloader-id=GRUB
grub-mkconfig -o /boot/grub/grub.cfg
Exit arch-chroot , unmount and Reboot
exit
umount -R /mnt
reboot
Remove installation media and log in.
Part 2: Modifying an Existing Arch Linux Installation
-
Boot from your installation media and reach the command prompt.
-
Identify and mount your existing Arch Linux
rootpartition to the/mntdirectory.⚠️ Warning: Do not format the partition. Simply mount it to access your files without erasing any data.
-
Enter the system by running
arch-chroot /mnt. -
Apply your changes, such as running
passwd [username]to reset a password. -
Finalize the process: Type
exitto leave the chroot, runumount -R /mntto safely unmount your partitions, and thenreboot.
thats it.