How to create partitions using cfdisk
In this guide, we will create two partitions:
Root Partition
EFI Partition
A Swap Partition is optional and not required for a normal setup, so we will skip it.
EFI Partition: 1GB (Type: EFI System)

Root Partition: 15GB (Type: Linux Filesystem)
Use the lsblk command to view details about available disks:

Identify the disk on which you want to create partitions (e.g., nvme0n1).
In this example, the disk is
vda
Use the following command to start partitioning:
cfdisk /dev/vdaExample:
cfdisk /dev/YOUR-DISK-NAME
If you don’t see this screen, simply continue from Available Options in cfdisk.
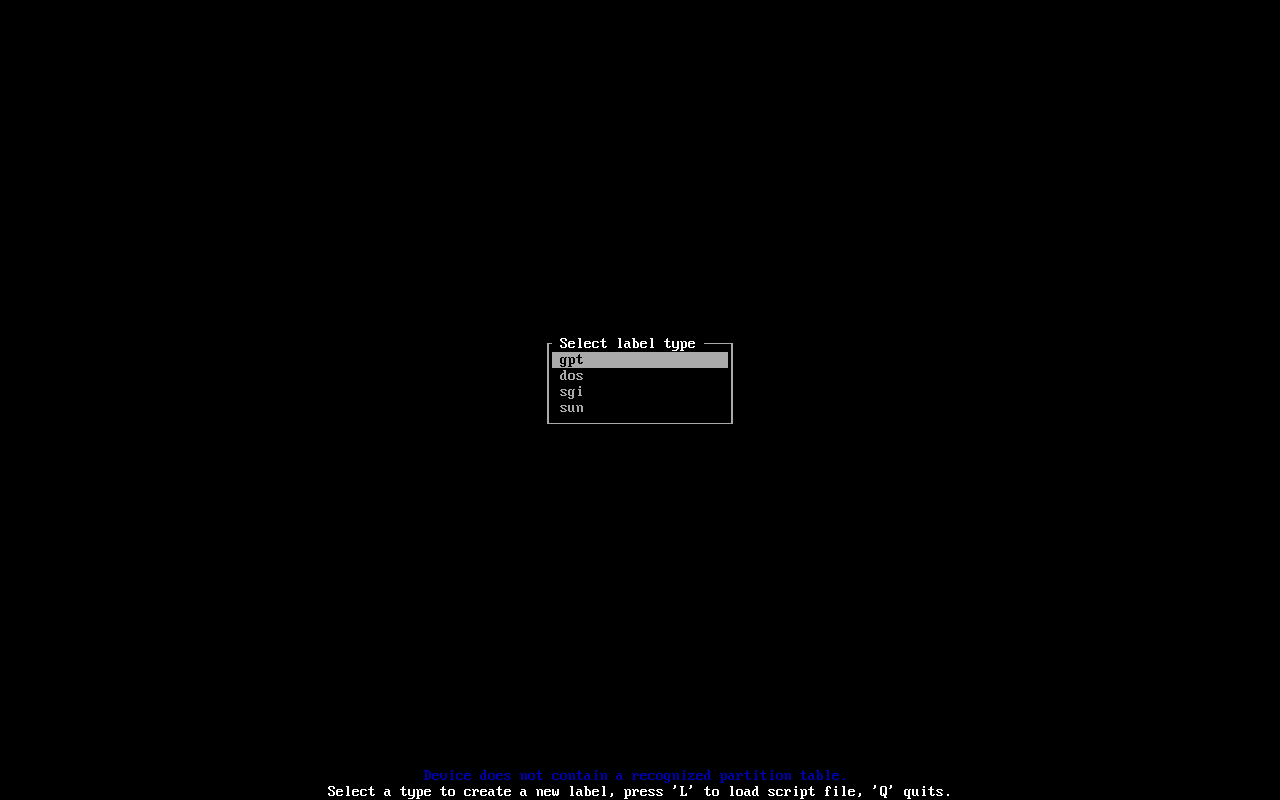
Choosing Partition Table Type
Use GPT when:
- Your system uses UEFI (most modern PCs & VMs)
- The disk size is larger than 2TB
- You want modern features and flexibility
Use MBR (DOS) when:
- You are using old BIOS-only systems
- You need compatibility with very old OS/tools
- You are setting up legacy configurations like dual-boot
Here, we will select GPT and press Enter.
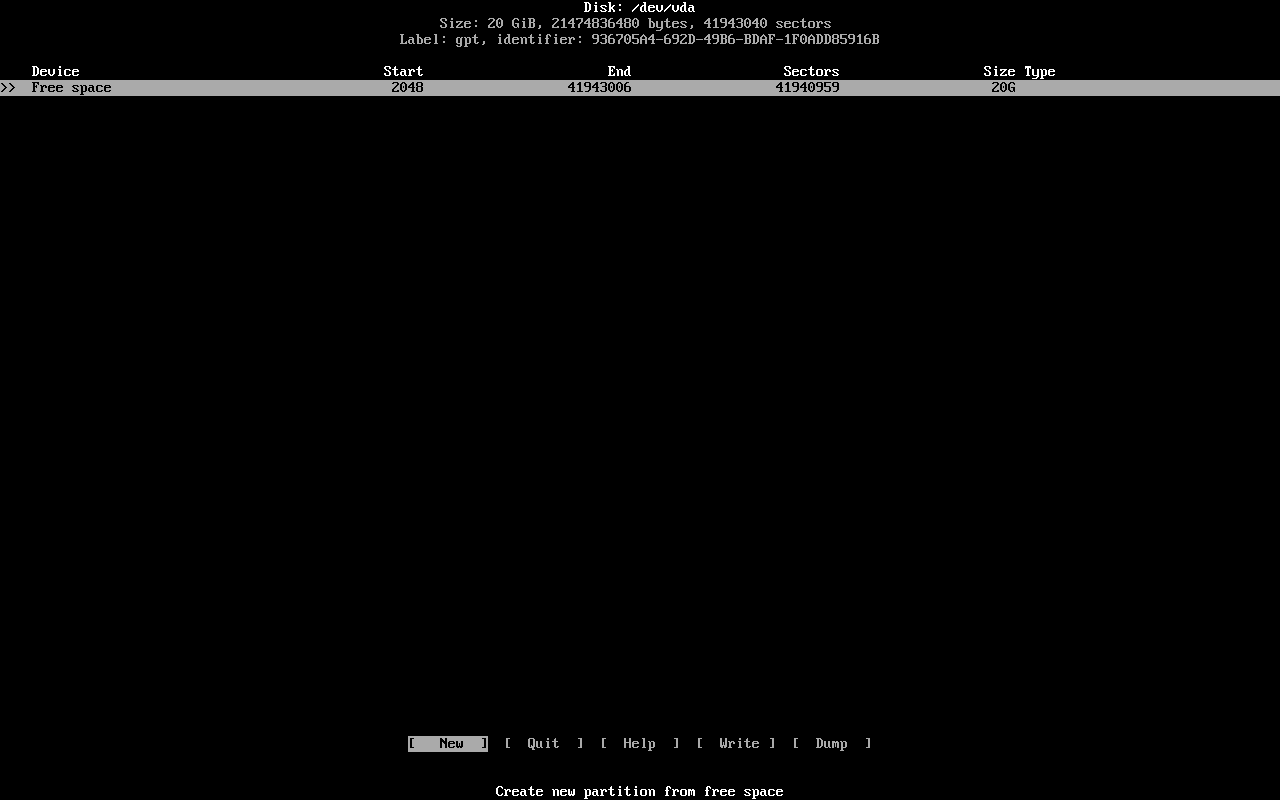
Available Options in cfdisk
At the bottom bar, you will see:
- [New]: Create a new partition
- [Quit]: Exit without saving changes
- [Help]: Show help information
- [Write]: Save all changes to disk (required to apply changes)
- [Dump]: Output the current partition table (for review/backup)
Use left/right arrow keys to navigate the bottom menu.
Creating the Root Partition
Select free space using up/down keys. Then choose [New] using left/right and press Enter.
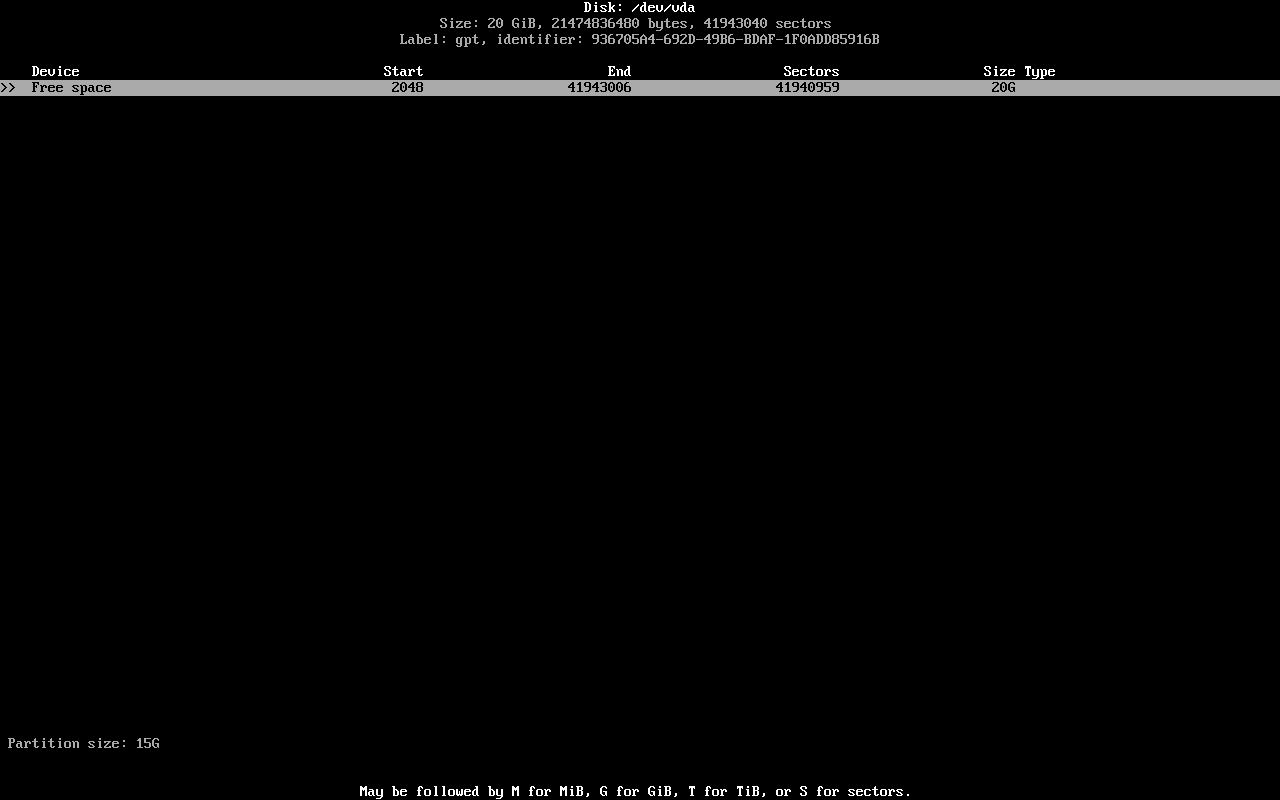
Set the partition size:
Partition Size:
15G
Press Enter.
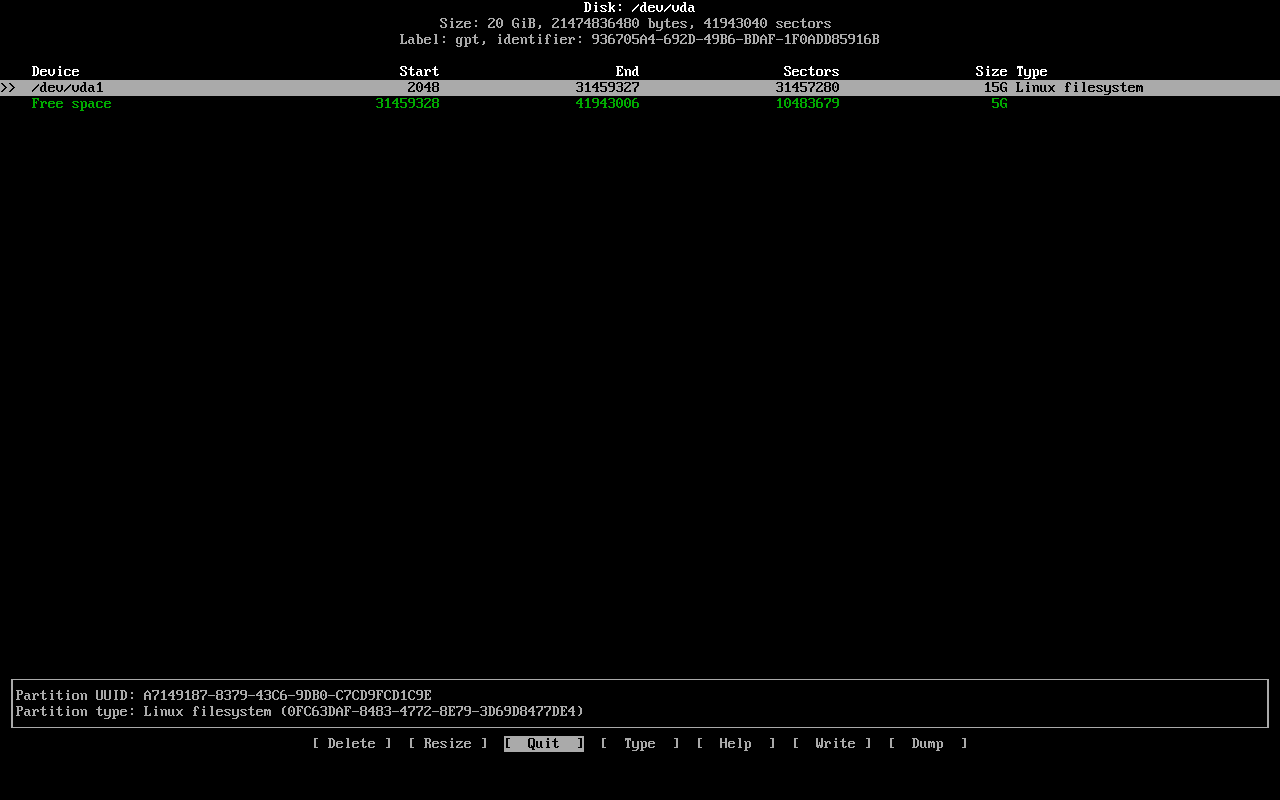
Select the newly created partition /dev/vda1 using up/down.
Example:
/dev/YOUR-DISK1
When the partition is selected, additional options appear:
- [Delete]: Delete the selected partition (applied after writing changes)
- [Resize]: Modify partition size (if possible)
- [Type]: Change partition type (e.g., Linux filesystem, swap)
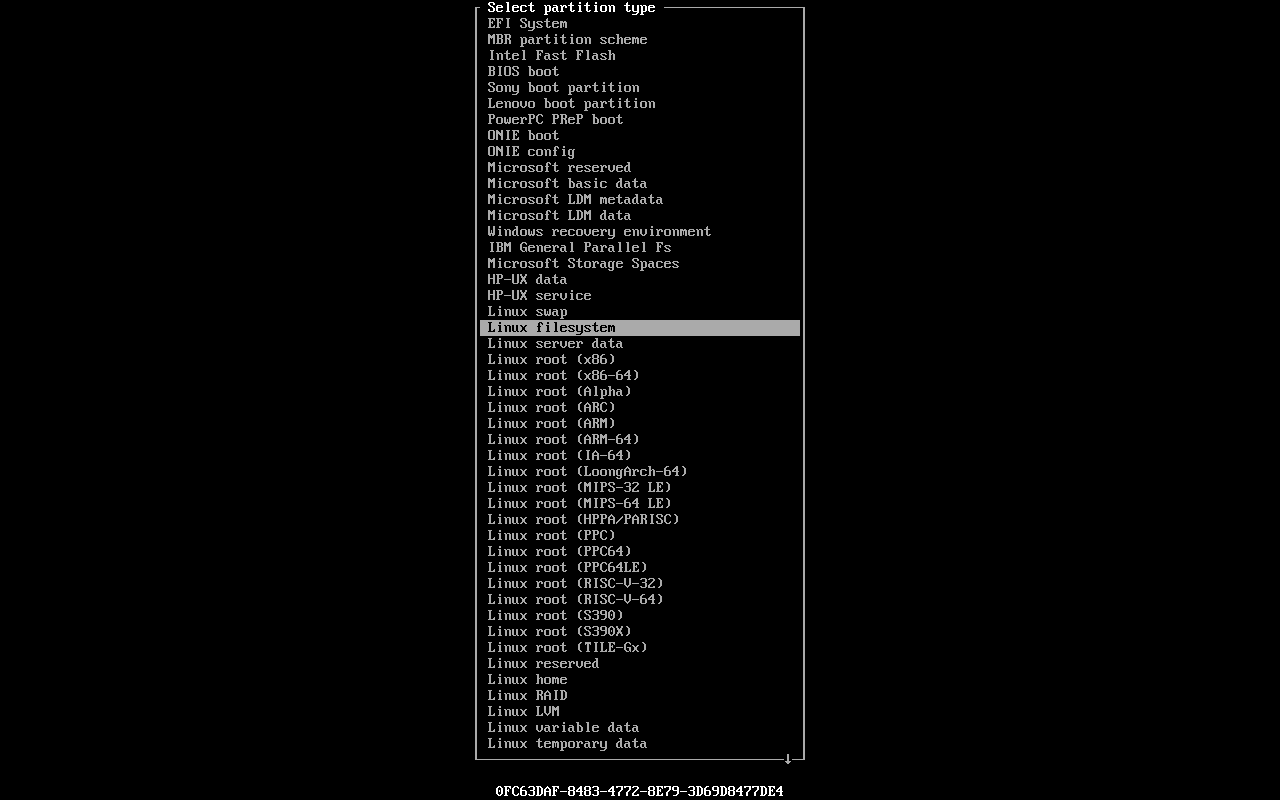
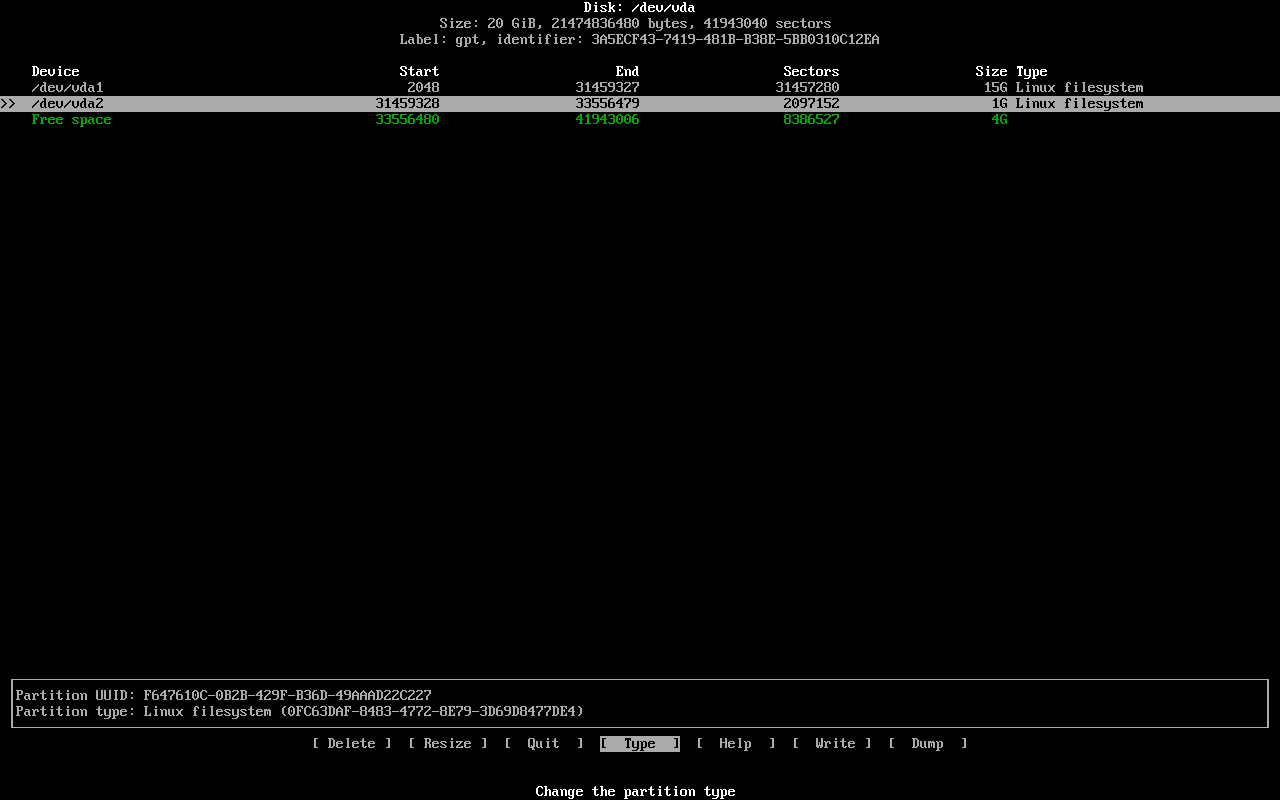
Setting Partition Type (Root)
Select the partition and choose [Type], then press Enter.
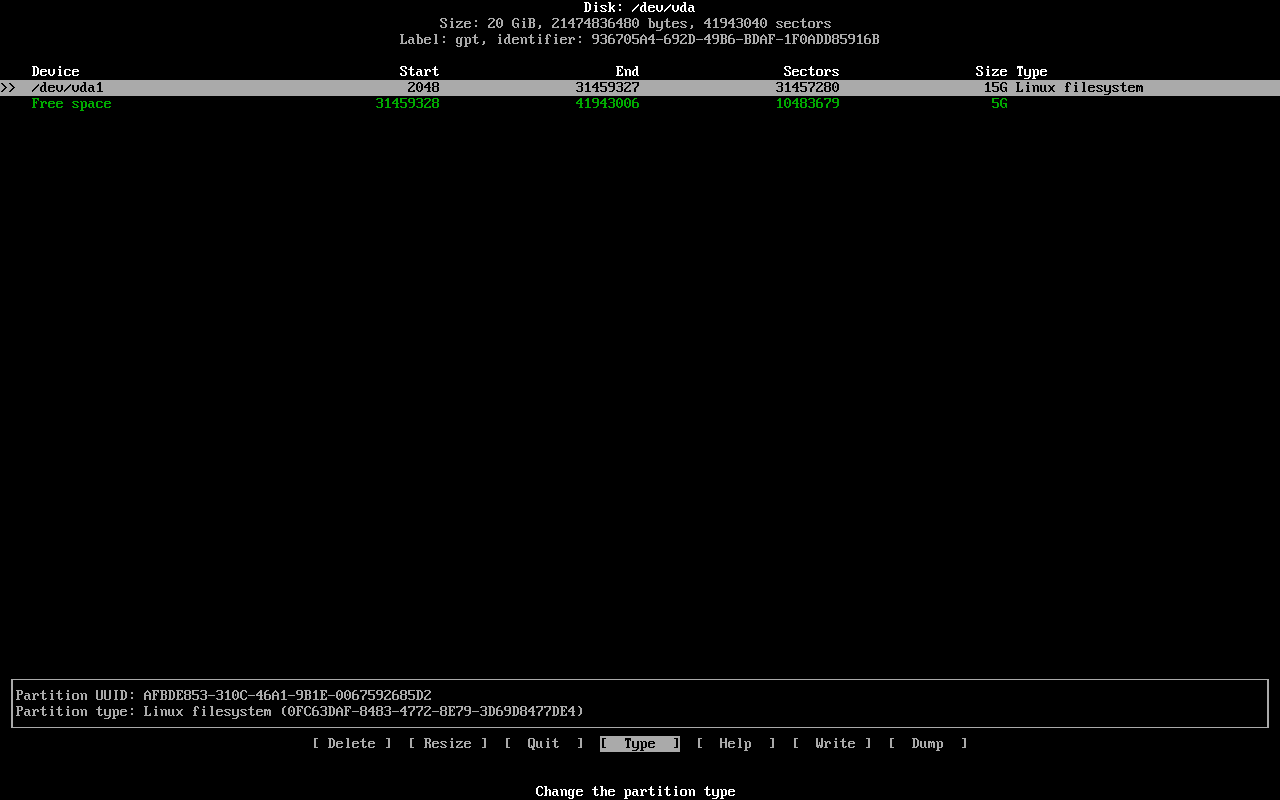
Choose Linux Filesystem as the type for the root partition and press Enter.
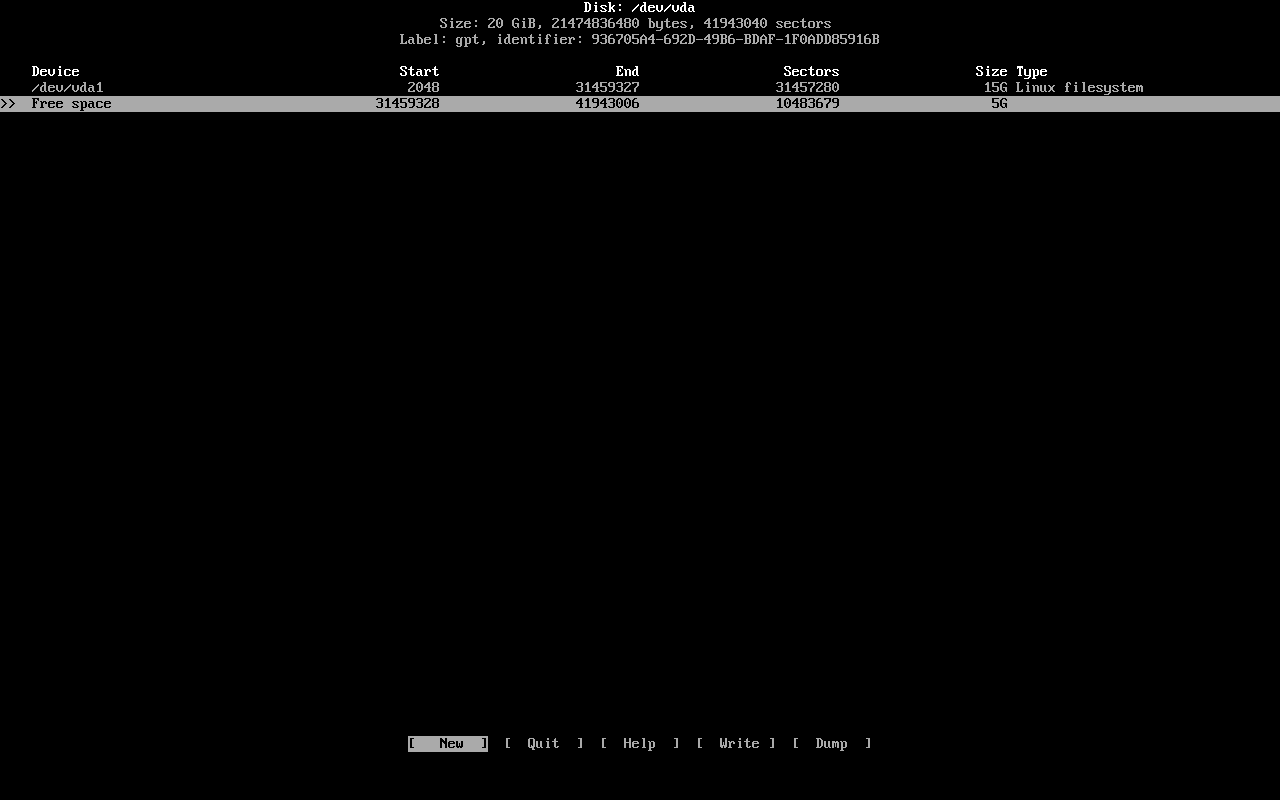
Creating the EFI Partition
Now create another partition for EFI.
Select the remaining free space → choose [New] → press Enter.
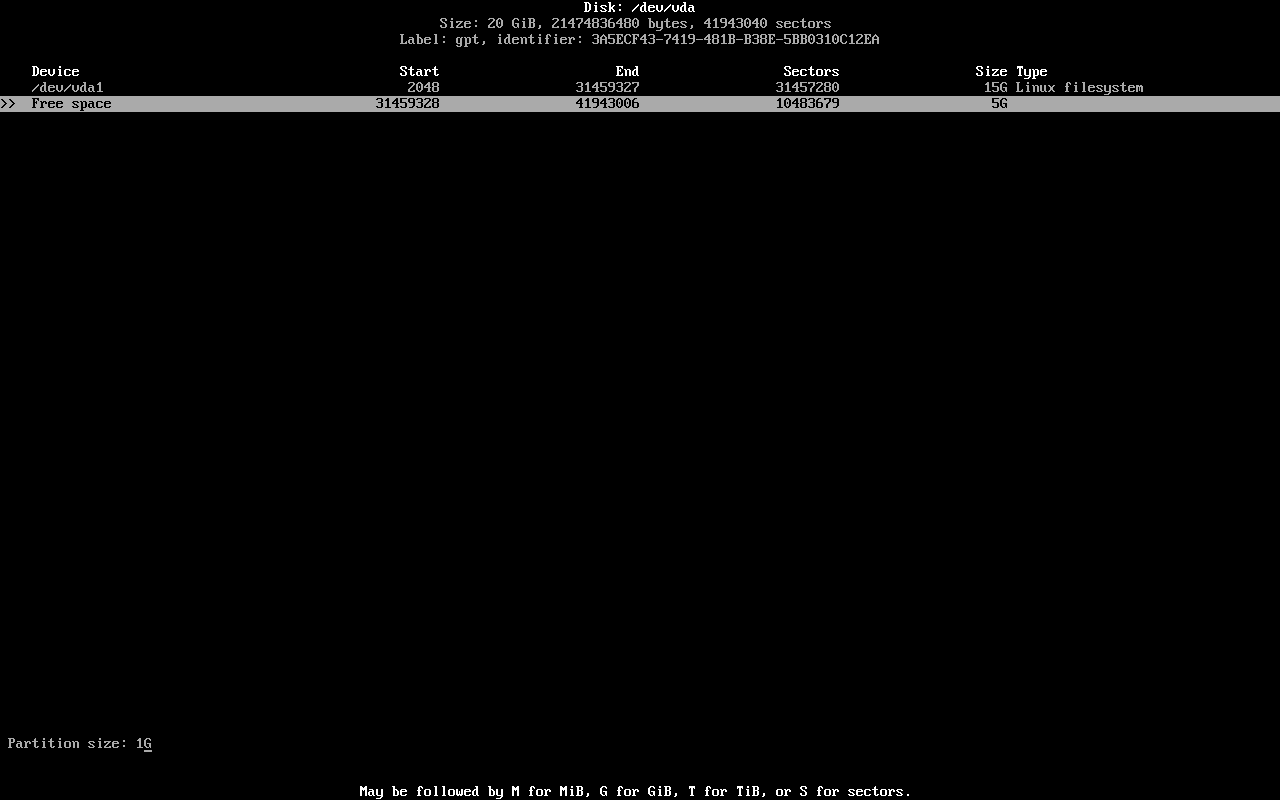
Set the size:
Partition Size:
1G
Press Enter.
Select the newly created partition /dev/vda2 using up/down.
Example:
/dev/YOUR-DISK2
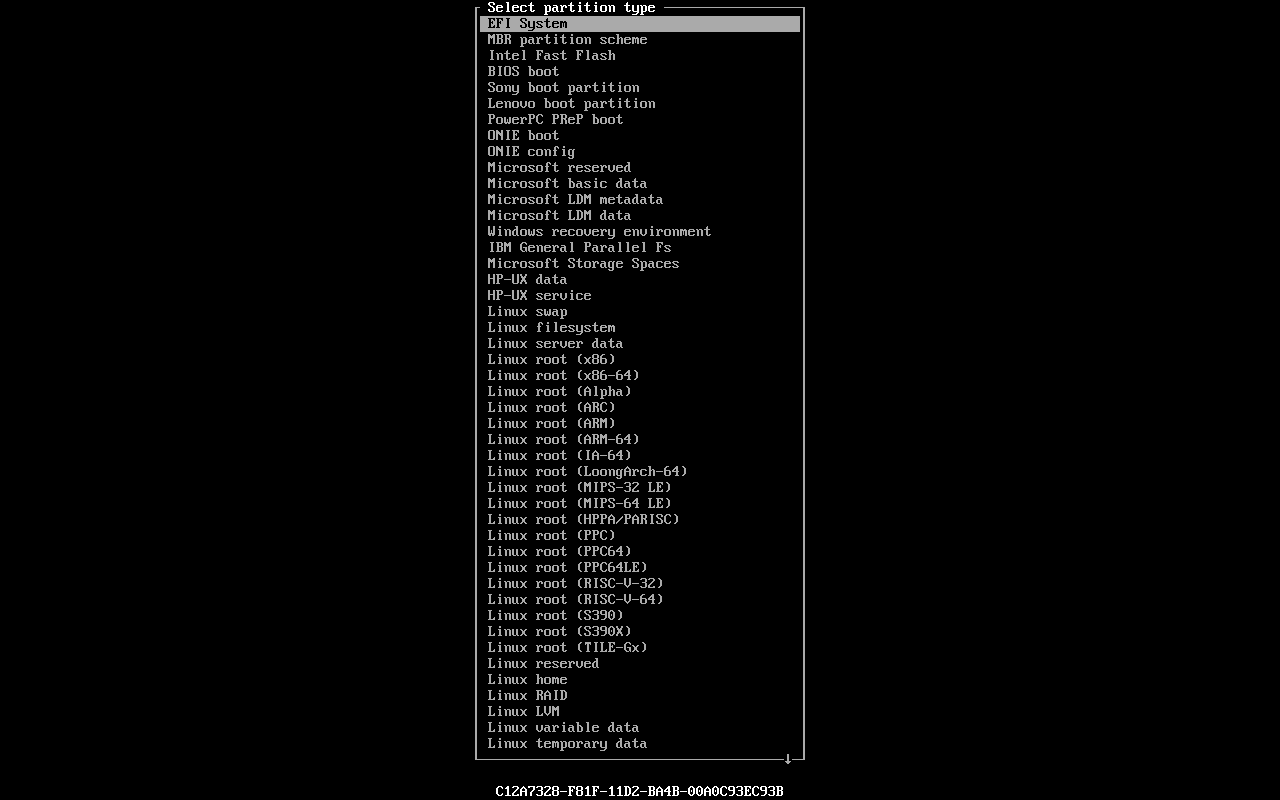
Then choose [Type] and press Enter.
Select EFI System as the type for /dev/vda2 and press Enter.
Final Partition Layout
You should now see:
/dev/vda1 : Linux Filesystem : 15G
/dev/vda2 : EFI System : 1G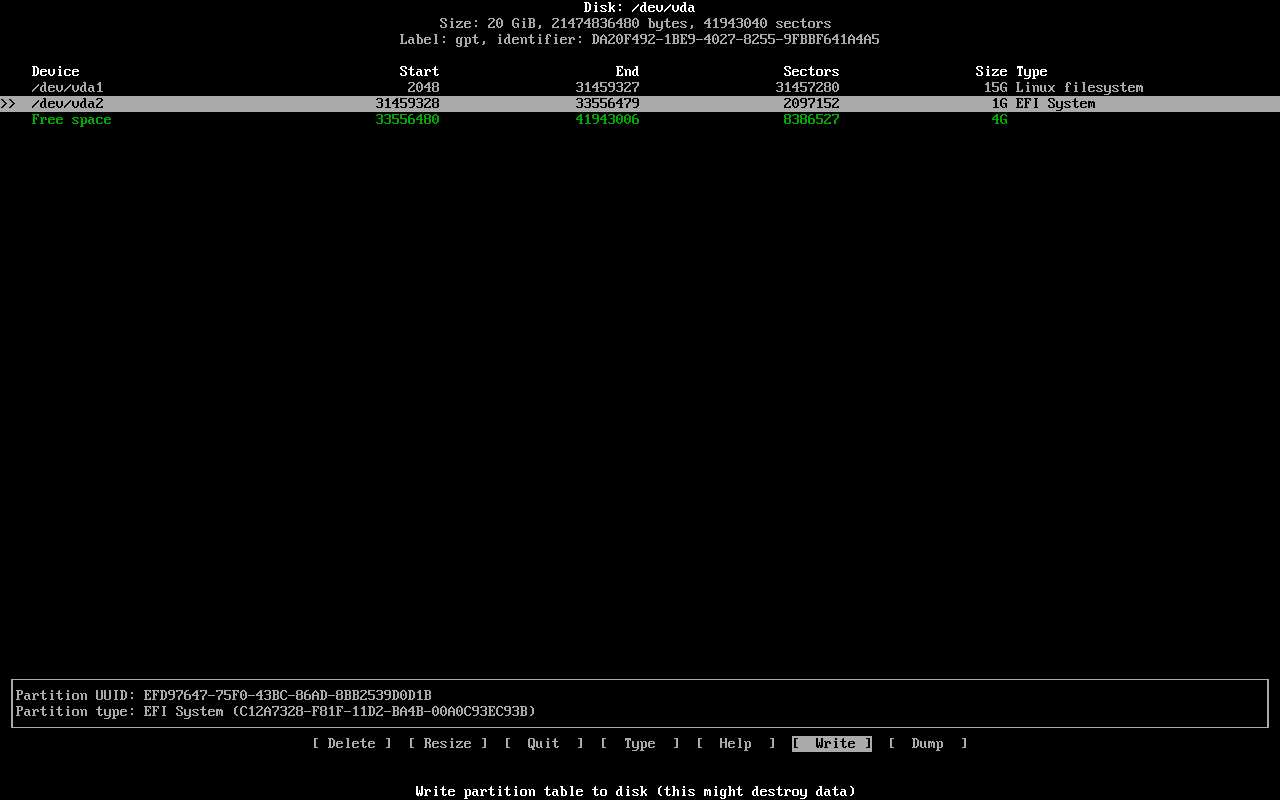
Saving Changes
Select [Write] using left/right and press Enter.
Type yes to confirm.
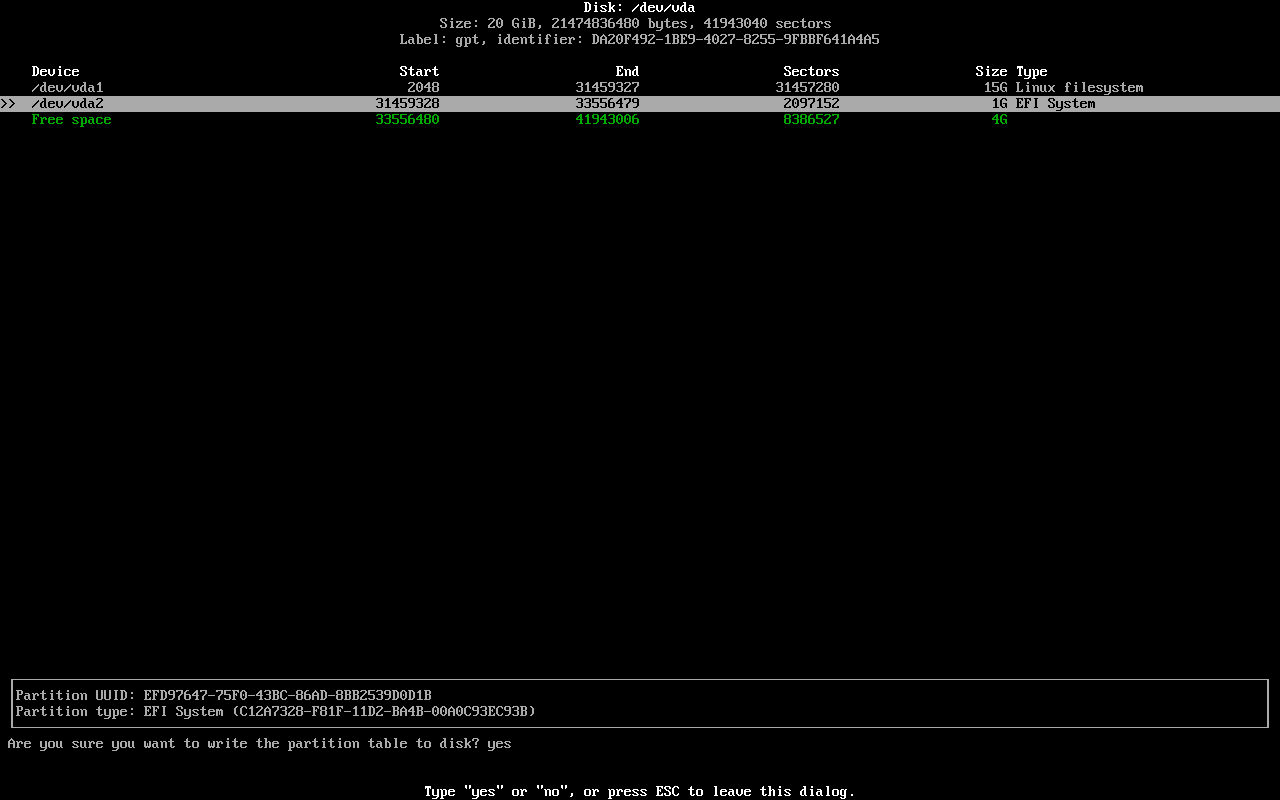
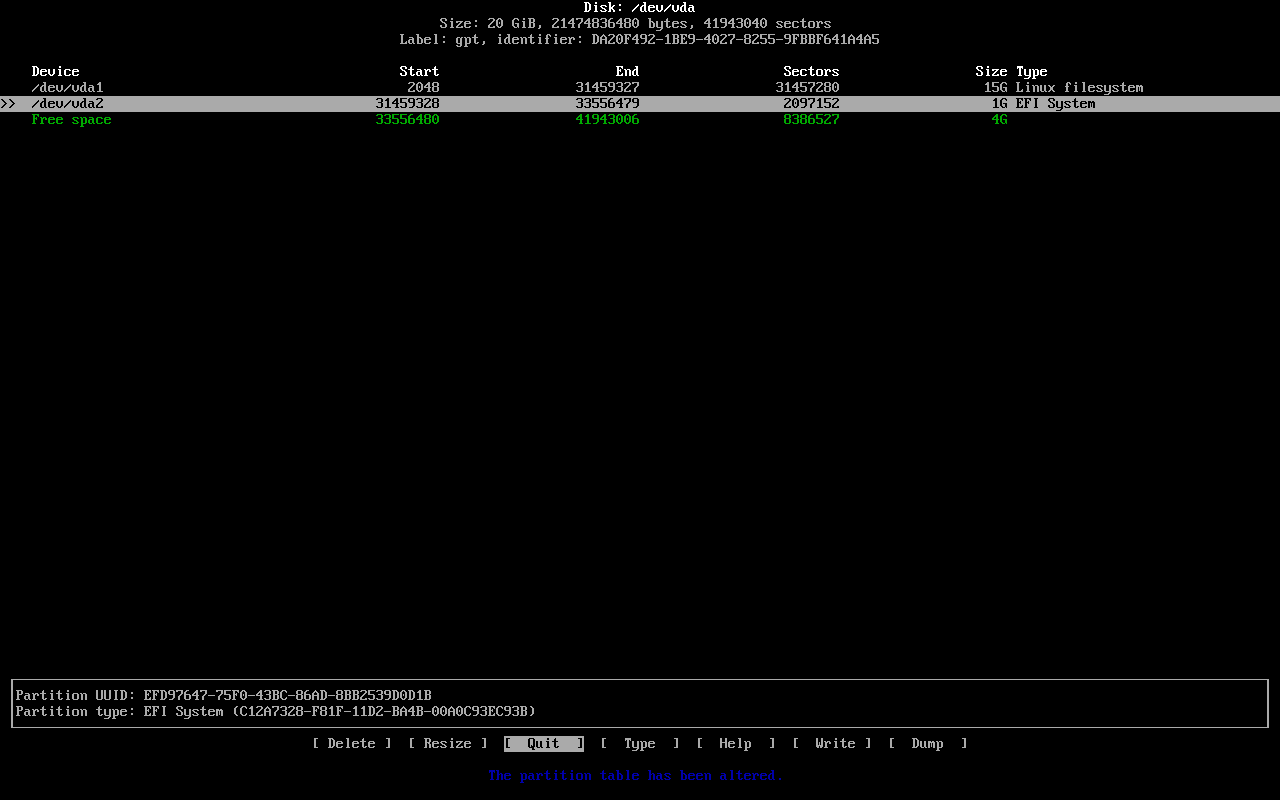
You will see a message:
The partition table has been altered
Now select [Quit] and press Enter.
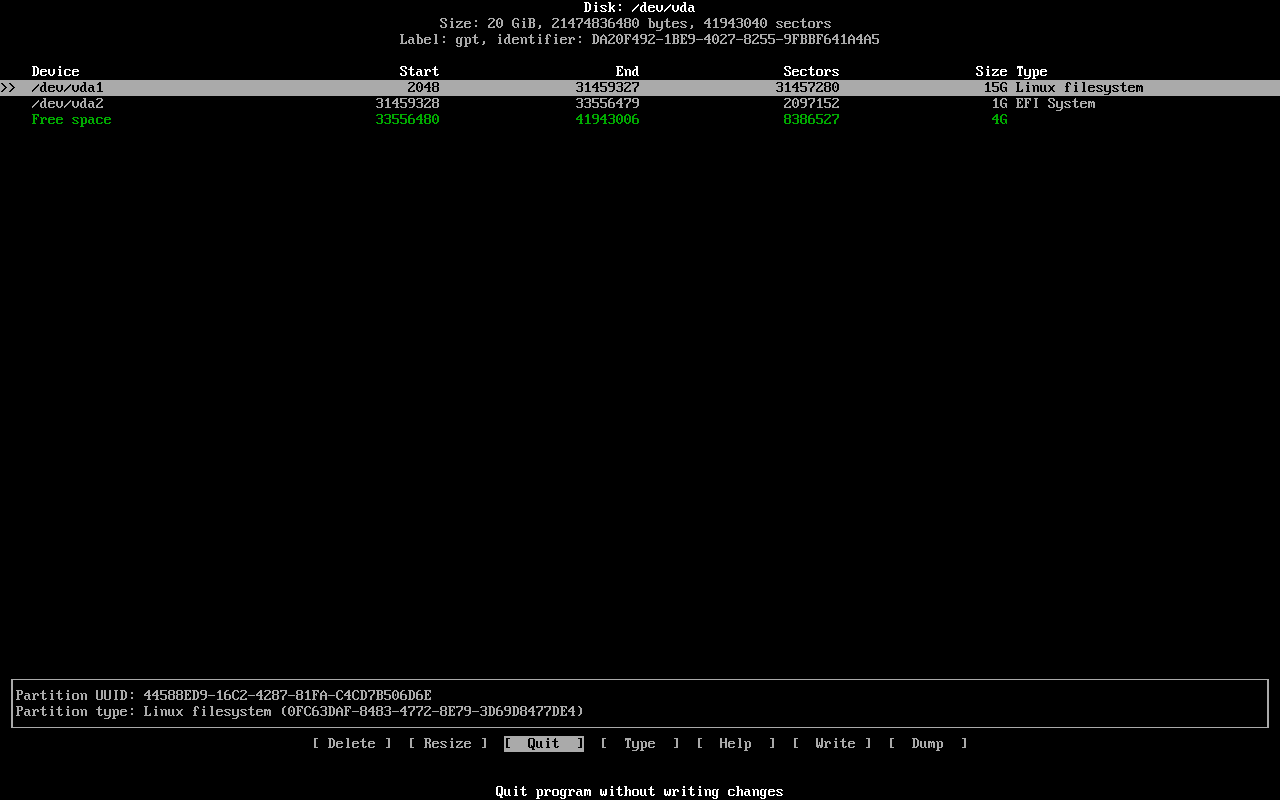
Verifying Partitions
Run the command again:
cfdisk /dev/vdaExample:
cfdisk /dev/YOUR-DISK-NAME
to verify the created partitions.
Next : Mount partitions